How to Draw a Seashell in 6 Steps (Scallop Shell)
This guide shows how to draw a scallop seashell in six steps. It provides easy to follow illustrated examples and simple instructions.

Scallops shells are one of the most common types of seashells. They generally have very distinct and beautiful fan-like shapes that make them easily recognizable. Drawing such a shell is not particularly complex, however, it can be even easier if you use the approach shown in this guide.
As with most similar tutorials here on EasyArtStart this one illustrates how to draw the object (in this case the seashell) by starting with an outline of it’s overall shape and then gradually adding the smaller details.
Be sure to start the tutorial in pencil and make light lines until you have all the different parts of the shell outlined. You can then darken them by tracing over your drawing.
For more on drawing sea life related drawing tutorials also try:
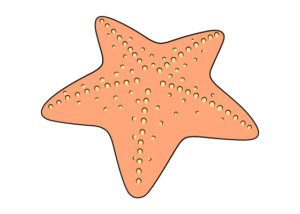
How to Draw a Starfish Step by Step
Step 1 – Outline the Fan-Like Shape of a Scallop Shell

As already mentioned, scallop shells have a shape similar to a fan. Outline the shell starting with a large curve for its top. Define this with a particularly light line (barely visible). Next, use a pair of fairly straight lines that are angled towards one another as they run down to define the the sides. Finally, join the two with a smaller downwards curve at the bottom to finish a basic outline of the seashell’s shape.
Try and make the shell fairly symmetrical so that both of it’s halves mirror one another. To achieve this it can be helpful to draw a straight vertical line down it’s middle. This can make it easier to see if both of the shell’s sides are close in shape and size.
Step 2 – Draw the “Scalloped” Edge of the Shell

The “scalloped” upper edge of these particular types of seashells are what gives them their names. However, a scallop is generally a series of curves or half-circle. If you look at an actual scallop shell the edge along it’s top is often a bit more like a series of waves (as shown in the example above).

Using the outline from the previous step as a guide draw a wavy line along the shell’s upper curve. Make this line darker than the curve itself but don’t press too hard on the pencil. This way it won’t leave marks if you have to erase it to make a correction.
Once you have the “scalloped” edge you can use the corner of an eraser to carefully clean up the upper part of the outline from the previous step.
Step 3 – Draw the “Ears” at the Bottom of the Shell

Near the bottom of the shell draw a pair of “ears”. These little protrusions that scallop shells have in that area help them swim. You can refer to the example above for their shapes.
Step 4 – Draw the Radial Grooves Running Between the Top & Bottom of the Seashell

Draw a series of grooves running from the ares in between the waves down to the bottom of seashell. You can define each groove with just a single. When adding these leave a little space between them and the edge of the shell (so that they don’t touch). The lines should fan out as they go up. Draw the lines near the sides more curved and the lines near the center more straight. This will help emphasize the curvature of the shell’s shape.
Once you’ve added the grooves darken your lines by tracing over them. You should then have a pretty much finished drawing of the seashell. Many scallops shells are are simply white without any patterns and you can leave things at this stage if you wish. However, adding a little more detail and some color can make a drawing more interesting and help it stand out from the white of the paper.
Step 5 – Draw a “Radiating Bands” Pattern Along the Shell’s Surface

Scallop shells often have a radial band pattern along their surface as shown in the example above. Define these bands with thin, wavy, broken up lines that curve from one side of the shell to the other. In this example there are two with the lower one being slightly thinner than the upper one. You can however add as many bands as you want.
The reason you want the outlines of the bands with thin broken up lines is to help convey that these don’t define a major part of the shell but just a pattern along it’s surface.
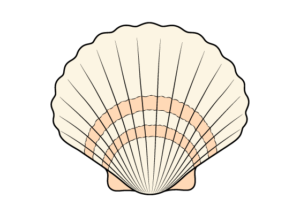
Step 6 – Color the Seashell

Coloring a seashell drawing like the one in this example can be quite easy. To do so as shown, first, simply make the entire shell a light orange and then go over the radial bands and “ears” with a slightly darker orange. An easy way to create this color variation is by just applying more or less pressure to an orange pencil. You also of course can use a different colors if you prefer. You can even simply shade the shell using a regular pencil. If you wish to do so then make the shell a light grey and the bands and ears a darker grey.
Whatever option you decide to go with you should have a finished drawing of the seashell once you are done with this step.
Conclusion – The Shapes of Scallop Shells Make them Interesting to Draw
Scallop shells have very distinct and beautiful shapes that can make them quite interesting to draw. This guide shows an easy to follow approach to drawing such as seashell. By getting the correct overall shape of an object first you can be more confident in adding it’s smaller details. This can help you avoid mistakes and/or minimize the amount of backtracking needed to fix them.
If you liked this guide on drawing a seashell also be sure to try the following:


")