How to Draw a Pear (6 Easy Steps)
This tutorial shows how to draw a ripe looking pear with it’s stem and a leaf. It consists of six steps in total.

The focus of the tutorial is on creating a pear drawing that is simple and looks good. This is achieved though first giving it a characteristic shape in the line drawing portion of the guide and then by applying a good combination of colors.
The tutorial also shows a logical drawing order of going from the larger and/or more important parts of the pear down to the smaller details.
If you are going to be following along it’s best to do so in pencil. Although the steps are put together in a way where you don’t necessarily have to do any erasing, it’s best to be on the safe side. Also try and make fairly light lines that won’t leave marks when erased. You can darken them when you have the entire pear outlined.
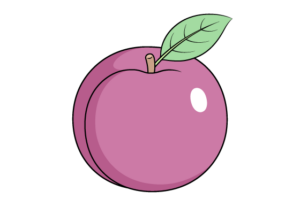
For drawing an apple in a similar style see:
How to Draw an Apple Step by Step
Step 1 – Draw an Outline of the Pear’s Shape

First, outline the main body of the pear. Start by drawing the wider area at the bottom followed by the narrower/thinner area at the top. When creating the outline add a small upwards curve at the pear’s bottom and a tiny downwards curve at it’s top (where the stem grows out of).
Step 2 – Draw the Stem

Going out of the little curve at the top of the pear add the stem. Draw it curved and make it wider at the base, narrower in the middle and again wider at the top.
Step 3 – Outline the Leaf

Attached to the very top of the stem add the leaf. Start with the part that runs through it’s middle (the petiole/midrib) and then outline the blade. Make the blade wider as it goes towards the middle and then narrower again towards a curved and pointy tip.
Step 4 – Draw the Leaf Veins

Going from the middle towards the edges of the blade draw the leaf’s veins (make these curved). In this case you only need a few just to give ta hint that they are there.
For drawing a more detailed leaf see:
How to Draw a Leaf Step by Step
Step 5 – Color the Pear, Stem & Leaf

To color the pear fill it in with a yellow/green, Make the staff brown and the leaf a much darker green.
A good option for adding the colors is either paints or markers as they will make it easy to add the red over top (once dry). If using colored pencils you may want to add the red gradient at the same time you color the pear as the pencil colors can mix when applied over top one another and create more of a brown.
When coloring the drawing leave a couple of white spots to show the light reflecting from the pear. This will help create the feel of a smooth surface.
Alternatively you can add the white over top of the color with a white correction pen or opaque white paints.
Step 6 – Add a Gradient to Create the Ripe Look

To make the pear look like it’s ripe (or ripening) add a red gradient along the bottom of one of it’s sides. Red is also the complimentary color of green so the two go really good together.
An easy way to add the gradient is with a red pencil. Simply press harder on it for a darker red and gradually loosen up to blend it into the green.
For similar tutorial where you can use a similar method see:
How to Draw a Peach in Six Steps
Conclusion
When done properly even simple artwork can look really good.
This tutorial shows an easy way to draw a nice looking pear by giving it a shape that is very typical of such a fruit and by applying a good combination of colors.
If you like these kinds of step by step guides with helpful instructions and easy to follow illustrated examples also be sure to try:

")
")